
Safe paint removal in 2026: homeowner's complete guide
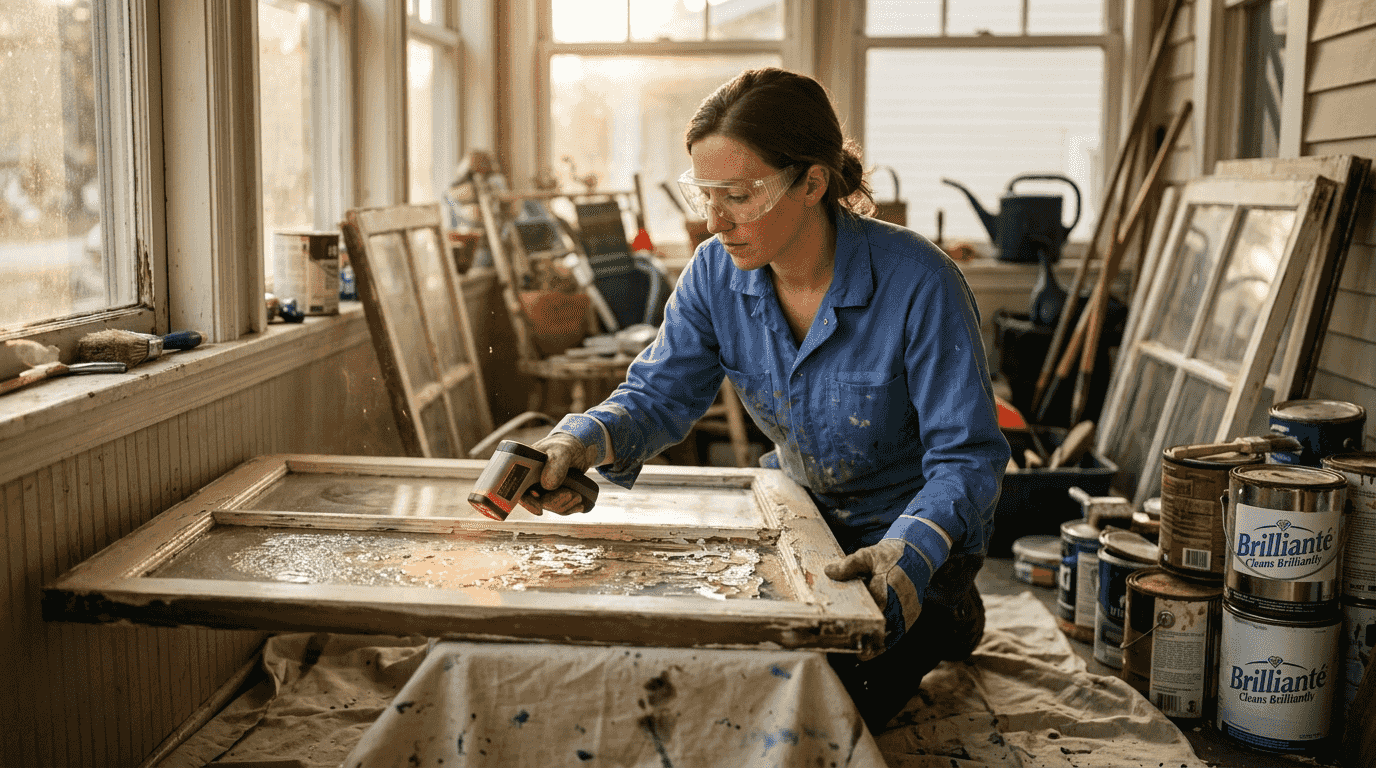
Removing old paint from your home can expose you and your family to serious health risks, especially if you live in a house built before 1978. Lead-based paint becomes hazardous when disturbed, releasing toxic dust and fumes into your living space. Fortunately, safer methods and eco-friendly products now make it possible for homeowners to tackle paint removal projects without compromising health or environmental responsibility. This guide walks you through lead-safe work practices, proven removal techniques, and essential safety protocols to protect yourself while achieving professional results.
Key takeaways
| Point | Details |
|---|---|
| Lead paint hazards | Homes built before 1978 likely contain lead paint that becomes dangerous when disturbed during removal |
| Safe removal methods | Infrared heating and citrus-based chemical strippers minimize harmful dust and fumes compared to traditional sanding |
| Essential preparation | Proper protective gear including N100 respirators and containment setup prevents exposure to toxic particles |
| Professional help | Certified contractors should handle extensive lead paint projects to ensure regulatory compliance and safety |
| Eco-friendly alternatives | Modern non-toxic paint removers deliver effective results while protecting your health and the environment |
Understanding the risks and regulations of paint removal
Paint removal might seem straightforward, but it carries hidden dangers that every homeowner must understand before starting. Lead-based paint is common in homes built before 1978 and becomes a serious health threat when you sand, scrape, or heat it. The dust created during removal contains lead particles small enough to inhale or ingest, causing neurological damage, kidney problems, and developmental issues in children.
The EPA recognizes these risks and has established clear guidelines. While the Renovation, Repair, and Painting Program requires certified contractors for professional work in pre-1978 homes, homeowners performing their own renovations must still follow lead-safe work practices. These regulations exist because unsafe removal methods create contamination that persists long after the project ends.
Certain techniques pose extreme hazards and should never be used:
- Dry sanding generates massive amounts of lead dust that spreads throughout your home
- Open flame torching vaporizes lead into toxic fumes you can easily inhale
- High-temperature heat guns above 1100°F create similar vaporization risks
- Power washing without containment spreads contaminated water across your property
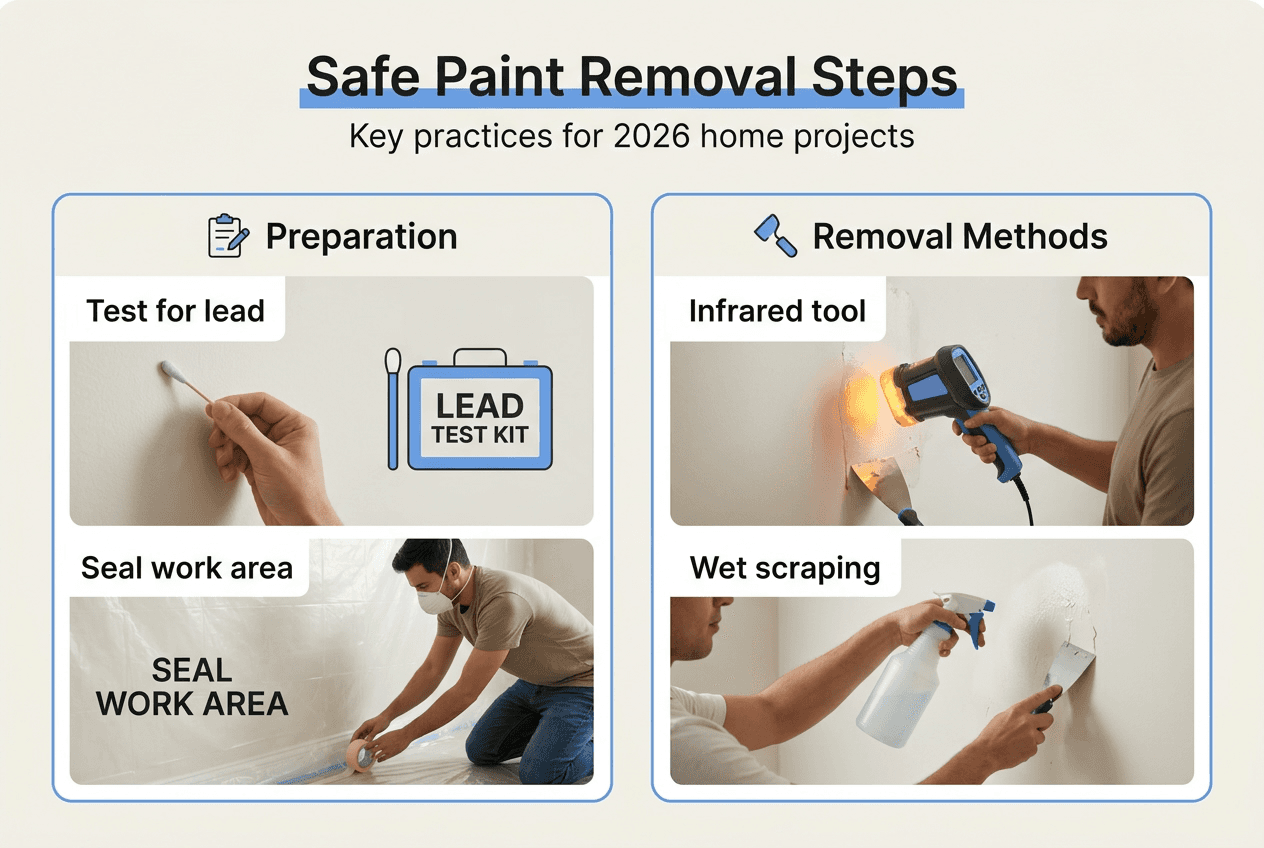
Pro Tip: Test your paint before starting any removal project using an EPA-recognized lead test kit available at most hardware stores for under $10.
The foundation of safe paint removal rests on three principles: contain the work area, minimize dust generation, and protect yourself with proper equipment. Following eco-friendly dust reduction tips helps you maintain a cleaner, safer workspace throughout your project. Understanding these risks transforms paint removal from a casual weekend task into a carefully planned operation that protects your family’s health.
Preparing for safe and effective paint removal
Successful paint removal begins long before you pick up a scraper or apply chemical stripper. Your preparation determines whether the project proceeds safely or creates lasting contamination problems. Start by confirming whether you’re dealing with lead paint through professional testing or EPA-approved test kits if your home was built before 1978.
Gather essential protective equipment before touching any painted surface:
- N100 respirator masks that filter at least 99.97% of airborne particles
- Disposable coveralls that prevent paint dust from contaminating your clothing
- Chemical-resistant gloves rated for paint stripper exposure
- Safety goggles with side shields to protect against splashes and particles
- Shoe covers to prevent tracking contaminated dust throughout your home
Your work area setup requires careful attention to containment. Cover floors and furniture with 6-mil plastic sheeting, securing edges with painter’s tape to create an airtight barrier. Close HVAC vents and seal doorways with plastic to prevent dust migration. Open windows for ventilation, but position fans to blow air outward, never inward where they could spread contamination.
Pro Tip: Create a decontamination zone at your work area entrance with a damp mat for wiping shoes and a trash bag for disposing of protective gear before leaving.
Wet methods form the cornerstone of lead-safe work practices by keeping dust particles heavy and grounded. Keep a spray bottle filled with water nearby to mist surfaces before scraping. Attach HEPA vacuum hoses to sanders and use wet sanding techniques whenever possible. These simple steps reduce airborne particles by up to 90% compared to dry methods.
Assemble your removal tools based on your chosen method:
| Tool Category | Essential Items | Purpose |
|---|---|---|
| Heat removal | Infrared paint remover, heat-resistant gloves | Softens paint without creating toxic fumes |
| Chemical stripping | Citrus-based stripper, plastic scrapers, neutralizing solution | Dissolves paint bonds safely and effectively |
| Manual removal | Carbide scrapers, wet sanding blocks, HEPA shop vacuum | Controls dust while removing loosened paint |
| Cleanup supplies | Microfiber mops, HEPA vacuum, disposal bags | Captures residual contamination thoroughly |
Applying eco-friendly dust reduction tips during setup prevents problems before they start. Position your work light to illuminate the surface at an angle, making it easier to spot remaining paint without excessive scraping. Organize tools within easy reach to minimize movement that could disturb settled dust. This methodical preparation sets the stage for efficient, safe paint removal.
Proven safe methods for removing paint
Choosing the right removal method dramatically affects both your safety and project efficiency. Modern techniques prioritize minimizing dust and fumes while delivering results that match or exceed traditional approaches. Understanding each method’s strengths helps you select the best option for your specific situation.
Infrared paint removal represents a breakthrough in safe stripping technology. Infrared paint removers heat paint below hazardous levels while softening multiple layers simultaneously, typically reaching working temperature within minutes. The controlled heat avoids vaporizing lead or creating combustion risks associated with open flames. You simply hold the infrared panel against the surface for 30 to 60 seconds, then scrape away softened paint with minimal effort. This method works exceptionally well on wooden trim, doors, and exterior siding.
Chemical stripping has evolved significantly beyond the toxic methylene chloride formulas of the past. Modern non-methylene chloride chemical strippers use citrus-based or soy-based solvents that dissolve paint bonds without releasing harmful fumes. These eco-friendly alternatives require longer dwell times, typically 15 to 30 minutes, but eliminate respiratory hazards while working equally well on intricate surfaces like ornate moldings or carved details. The biodegradable formulas also simplify disposal compared to traditional chemical strippers.
Wet sanding and scraping provide maximum control for detail work and final cleanup. Keeping surfaces damp throughout the process prevents dust from becoming airborne. Attach a HEPA-filtered vacuum hose directly to your sander, capturing particles at the source. Work methodically in small sections, frequently misting with water and vacuuming debris before it accumulates.
Pro Tip: Freeze chemical stripper containers overnight before use to slow evaporation, extending working time and improving penetration on thick paint layers.
Comparing methods helps you choose wisely:
| Method | Best For | Advantages | Limitations |
|---|---|---|---|
| Infrared | Flat surfaces, exterior work | Minimal dust, fast, reusable equipment | Initial equipment cost, requires electricity |
| Chemical stripping | Detailed trim, vertical surfaces | Works on intricate areas, no dust | Longer process, requires ventilation |
| Wet sanding | Final smoothing, small areas | Precise control, low cost | Labor intensive, slower coverage |
Avoid dry sanding and open-flame torching completely. Dry sanding creates clouds of lead dust that contaminate your entire home and pose severe inhalation risks. Open flames vaporize lead into invisible fumes while creating fire hazards. These outdated methods offer no advantages over modern alternatives and violate dust minimization techniques essential for safe paint removal.
Many successful projects combine methods strategically. Use infrared or chemical stripping for initial paint removal, then finish with wet sanding to achieve smooth surfaces ready for new paint. This layered approach maximizes efficiency while maintaining safety throughout every phase.
Executing paint removal safely: steps and tips
Proper execution transforms preparation and method selection into tangible results. Following systematic procedures ensures consistent quality while maintaining the safety protocols you established during setup.
For infrared paint removal, begin by positioning the heating panel 1 to 2 inches from the painted surface. Allow 30 to 60 seconds for heat penetration, watching for paint to bubble and soften. Remove the heat source and immediately scrape using smooth, controlled strokes parallel to the wood grain. Work in 12-inch sections to maintain consistent temperature and prevent paint from cooling and rehardening. Clean your scraper frequently to maintain sharp edges and efficient removal.
Chemical stripper application requires precision and patience:
- Apply a thick, even coat using a disposable brush, working stripper into crevices and details
- Cover the applied area with plastic wrap to prevent evaporation and enhance penetration
- Wait 15 to 30 minutes, checking periodically for paint wrinkling and lifting
- Remove plastic and test a small area by scraping gently to confirm readiness
- Scrape away dissolved paint using plastic scrapers that won’t damage underlying surfaces
- Neutralize residue with the manufacturer’s recommended solution before allowing surfaces to dry
Wet sanding and HEPA vacuum dust collection work together to eliminate airborne particles. Mist the surface lightly before each sanding pass. Keep your vacuum running continuously, positioning the hose intake within inches of your sanding area. Sand parallel to wood grain using light pressure and overlapping strokes. Stop frequently to vacuum accumulated debris and re-mist the surface.
Protective measures extend beyond equipment to include smart work habits:
- Take 10-minute breaks every hour to step outside for fresh air
- Never eat, drink, or smoke in the work area where lead dust can contaminate food
- Wash hands and face thoroughly before breaks and meals
- Change protective coveralls daily and seal used ones in plastic bags
- Shower immediately after completing work sessions to remove residual dust
Pro Tip: Mark completed sections with painter’s tape to track progress and avoid over-working areas, which increases dust generation without improving results.
Common mistakes undermine safety and efficiency. Excessive sanding removes wood along with paint, creating uneven surfaces that require extensive repair. Overheating paint with infrared tools or heat guns causes scorching and potential ignition. Rushing chemical stripper dwell time forces you to reapply product, wasting materials and time. Skipping protective gear even briefly exposes you to cumulative toxins that cause long-term health problems.
Applying eco-friendly paint removal tips throughout execution maintains environmental responsibility alongside personal safety. Dispose of paint scrapings in sealed containers labeled as hazardous waste. Avoid washing chemical residues down drains where they contaminate water systems. These conscientious practices protect both your immediate environment and the broader ecosystem.
Verifying results and ensuring safe cleanup
Thorough cleanup determines whether your paint removal project ends safely or leaves behind hidden contamination. Residual dust and paint particles pose ongoing health risks if not properly addressed through systematic verification and cleaning procedures.
Inspect stripped surfaces under bright, angled lighting to identify remaining paint spots or damage. Run your hand across the wood to feel for rough patches or paint residue that visual inspection might miss. Address problem areas immediately while containment remains in place and protective equipment is still worn. Small touch-ups now prevent having to recreate your entire safety setup later.
HEPA-filter vacuums capture particles as small as 0.3 microns, making them essential for final cleanup. Vacuum all surfaces within the work area, including walls, floors, windowsills, and any furniture that remained covered. Use the crevice tool attachment to reach corners and edges where dust accumulates. Empty the vacuum canister outside into a sealed disposal bag to prevent recontaminating your home.
Wet mopping provides a second layer of dust capture that vacuuming alone cannot achieve:
- Use two buckets, one for cleaning solution and one for rinsing
- Change water frequently as it becomes visibly dirty
- Mop from the farthest point toward your exit to avoid walking on cleaned areas
- Dispose of mop water outside or down a toilet, never in kitchen sinks
Pro Tip: Seal stripped wood surfaces with a clear primer within 24 hours to encapsulate any microscopic paint residue and create a stable base for new finish coats.
Properly contain and dispose of all project waste as hazardous material. Paint chips, used plastic sheeting, protective coveralls, and cleaning materials must go into heavy-duty disposal bags clearly marked as containing lead-contaminated debris. Contact your local waste management authority for approved disposal locations, as regular trash pickup typically cannot accept these materials.
If you have concerns about residual contamination, consider professional testing. Lead dust test kits provide peace of mind by confirming your cleanup successfully reduced lead levels to safe thresholds. Air quality monitors detect elevated particle counts that might indicate inadequate ventilation or incomplete cleanup.
Following EPA cleanup recommendations ensures you meet safety standards even without certification requirements. Remove containment barriers carefully, misting plastic sheeting before folding to prevent dust from becoming airborne. Clean tools with damp cloths before storing them away from living areas. These final steps complete your transition from active work zone back to safe living space.
Get expert help and eco-friendly products for safe paint removal
Completing a safe paint removal project deserves recognition, and maintaining that clean, healthy environment requires ongoing attention to detail. Whether you tackled the work yourself or you’re planning your next project, having access to quality cleaning products makes post-renovation maintenance easier and more effective.
Brilliante offers eco-friendly cleaning products designed to help you maintain the pristine results you worked hard to achieve. Our environmentally responsible formulas deliver professional-grade cleaning power without harsh chemicals that could compromise your newly refreshed surfaces. From routine dusting to deep cleaning, we provide solutions that align with the same health-conscious approach you applied to your paint removal project.
Explore our collection of dust reduction cleaning tips to keep your home spotless between major projects. For extensive lead paint situations or if you feel uncertain about safety protocols, don’t hesitate to contact certified professionals who can ensure complete compliance with regulations while protecting your family’s health.
Frequently asked questions
How can I tell if my home has lead paint?
Homes built before 1978 have a high probability of containing lead-based paint, especially on trim, windows, and doors. Purchase an EPA-recognized lead test kit from hardware stores for immediate results, or hire a certified inspector for comprehensive testing that identifies all lead-painted surfaces. Professional testing costs between $300 and $500 but provides detailed reports useful for planning renovation projects.
Is infrared paint removal safe for DIYers?
Infrared removal is one of the safest methods available for homeowners because it minimizes dust generation and operates below temperatures that vaporize lead. The equipment requires no special licensing to operate and produces results comparable to professional methods. Always wear appropriate respiratory protection and follow manufacturer guidelines for safe operating distances and exposure times.
What protective gear should I wear during paint removal?
Wear an N100 respirator that filters 99.97% of particles, not a basic dust mask that provides inadequate protection against lead. Combine this with disposable coveralls, chemical-resistant gloves, and safety goggles with side shields to prevent skin contact and eye exposure. Shoe covers prevent tracking contaminated dust outside the work area, and all protective gear should be disposed of as hazardous waste after use.
When should I hire a professional for paint removal?
Hire certified lead-safe contractors for projects involving more than 6 square feet of interior painted surfaces or 20 square feet of exterior surfaces in pre-1978 homes. Professional help is essential if you’re uncertain about safety protocols, lack proper equipment, or the project involves extensive lead paint throughout your home. Certified contractors carry specialized insurance and follow EPA regulations that protect you from liability and health risks.