
Basic electrical safety tips for cleaning chandeliers
Cleaning your chandelier shouldn’t put you at risk of electric shock or damage to your beautiful fixture. Many homeowners focus on restoring sparkle to their crystals while overlooking the electrical hazards lurking in exposed wiring, moisture contact, and live circuits. This guide walks you through essential electrical safety practices that protect you during chandelier maintenance. You’ll learn how to disconnect power properly, use safe cleaning techniques, and maintain your fixture for long-term safety. With the right knowledge and preparation, you can keep your chandelier stunning without compromising your well-being or your home’s electrical system.
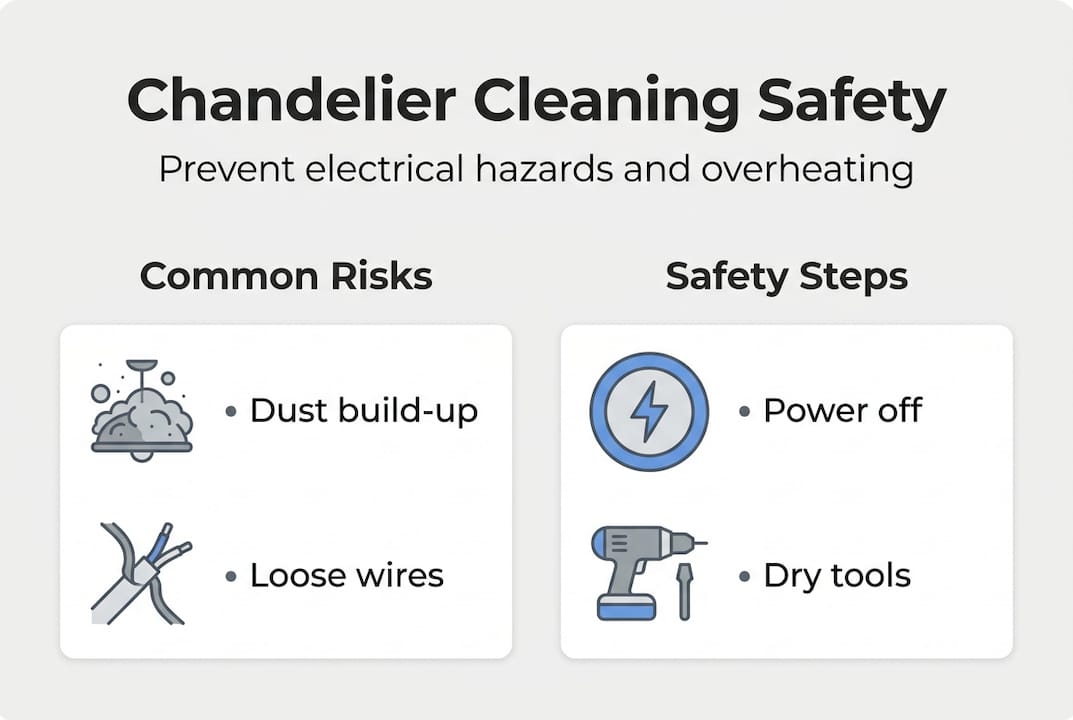
Key Takeaways
| Point | Details |
|---|---|
| Power off before cleaning | Always cut power at the breaker and verify the chandelier is deenergized before you start cleaning. |
| Nonconductive tools | Choose tools made from nonconductive materials and avoid metal during cleaning near wiring. |
| Avoid water contact | Keep water and cleaning solutions away from electrical connections to prevent shorts and shocks. |
| Inspect wiring for damage | Regularly check insulation, loose connections, and signs of wear and replace damaged components before cleaning. |
| Follow safety steps | Follow a clear safety procedure checklist to stay organized and reduce risk during chandelier maintenance. |
Understanding electrical hazards in chandeliers
Chandeliers combine delicate beauty with complex electrical systems, creating unique safety challenges during cleaning. Many chandelier-related accidents result from neglecting to disconnect power before cleaning, making electrical awareness your first line of defense. The fixture’s elevated position, multiple connection points, and exposure to moisture during cleaning all increase risk.
Electric shock occurs when your body becomes a path for electrical current. Chandeliers hang from ceiling junction boxes where live wires connect to the fixture. Touching these connections while power flows can cause serious injury or death. Short circuits happen when electricity finds an unintended path, often through water or damaged insulation. These events can spark fires, damage your electrical system, or destroy the chandelier itself.
Exposed or damaged wiring creates immediate danger. Over time, wire insulation cracks from heat, age, or physical stress. When you clean around compromised wiring, you risk direct contact with live conductors. Loose connections at sockets or mounting points can arc when disturbed, producing sparks that ignite dust or cleaning solutions.
Moisture is electricity’s highway. Even small amounts of water on electrical components create conductive paths where none should exist.
Cleaning liquids amplify electrical hazards significantly. Water conducts electricity readily, and many cleaning solutions contain ions that enhance conductivity. Spraying cleaner near live wiring or sockets can cause immediate shorts. Drips that reach junction boxes or wire connections create ongoing hazards that persist after you finish cleaning.
Your home’s electrical system operates at 120 volts in most circuits, enough to cause fatal shock under the right conditions. Cutting power at the source eliminates this risk entirely. Understanding your breaker panel layout helps you identify which circuit controls your chandelier. Some homes have multiple lighting circuits, so testing after shutting off a breaker confirms you’ve disconnected the right one.
Dust accumulation on chandeliers isn’t just an aesthetic issue. Thick dust layers can trap heat around bulbs and wiring, accelerating insulation breakdown. When combined with moisture during cleaning, dust becomes conductive sludge that promotes shorts. Regular eco-friendly cleaning prevents this dangerous buildup.
Familiarity with your fixture’s construction helps you spot hazards. Crystal chandeliers typically have metal frames that conduct electricity if wiring fails. Glass fixtures may hide damaged connections behind decorative elements. Modern LED chandeliers include electronic drivers that require special care. Knowing what you’re working with shapes your safety approach.
Essential safety equipment and preparations
Proper preparation transforms chandelier cleaning from risky to routine. Using insulated tools and turning off power prevents most electrical cleaning incidents, giving you control over the two main hazard sources. Your equipment list should prioritize electrical safety alongside cleaning effectiveness.
-
Locate your electrical panel and identify the breaker controlling your chandelier. Test by switching it off and confirming the lights go dark. Label this breaker for future reference.
-
Gather insulated gloves rated for electrical work. These provide a barrier between your skin and any unexpected live components. Rubber-soled shoes add another layer of protection by preventing ground contact.
-
Select non-conductive cleaning tools made from plastic, rubber, or wood. Metal handles and frames can conduct electricity if they contact live parts. Microfiber cloths work well because they’re effective cleaners without conductive properties.
-
Prepare a stable ladder or platform that positions you comfortably at fixture height. Wobbly footing increases accident risk when you’re focused on delicate cleaning work. Ensure the ladder stands on dry, level ground.
-
Assemble your cleaning supplies in a non-conductive container. Plastic buckets and spray bottles eliminate metal that could conduct stray current. Keep supplies organized so you’re not reaching blindly while balanced on a ladder.
-
Check weather conditions if your chandelier hangs near windows or in humid spaces. High humidity increases electrical conductivity. Choose a dry day for cleaning when possible.
Pro Tip: Keep a non-contact voltage tester in your toolkit. These inexpensive devices detect live current without requiring contact with wires. Test the fixture after shutting off the breaker to confirm power is truly disconnected.
Inspect the fixture visually before touching it. Look for obvious damage like cracked sockets, exposed wires, or corroded connections. Flickering bulbs or burning smells indicate electrical problems that require professional attention before cleaning. Never proceed with cleaning if you spot these warning signs.

If your chandelier has a chain or cord connection, determine whether you can unplug it completely. Some fixtures include a disconnect point in the canopy or chain. Full disconnection provides absolute safety because no power can reach the fixture regardless of breaker position. This option isn’t available for hardwired installations, but it’s worth checking.
Document your fixture’s normal appearance with photos before starting. This helps you reassemble decorative elements correctly and provides a reference if you need to describe problems to an electrician later. Note the bulb types and positions so you can replace them accurately.
Cover nearby furniture and flooring with drop cloths. Cleaning solutions and crystal cleaner drips can damage surfaces below the chandelier. Plastic sheeting works better than fabric because it’s waterproof. Secure coverings so they won’t shift and create tripping hazards while you work.
Have a helper nearby during cleaning. They can steady your ladder, hand you tools, and call for help if something goes wrong. Solo chandelier cleaning increases risk because accidents happen when you’re least prepared. Following proper cleaning safety tips includes having backup support.
Step-by-step electrical safety during chandelier cleaning
Following a systematic process keeps electrical safety front and center throughout your cleaning session. Systematic safety checks and process adherence reduce electrical accidents during home cleaning, turning good intentions into reliable protection. Each step builds on the previous one to create multiple safety layers.
-
Confirm power disconnection at the breaker panel. Flip the breaker to the off position and verify the chandelier lights don’t turn on. If you have a voltage tester, use it now to check for current at the fixture.
-
Remove all light bulbs carefully, placing them in a safe container away from your work area. Bulbs are fragile and their metal bases conduct electricity. With bulbs removed, you eliminate heat sources and reduce breakage risk.
-
Cover exposed sockets with plastic bags or tape. This prevents cleaning solution from entering the electrical connections inside each socket. Moisture in sockets causes corrosion and shorts even after the fixture dries.
-
Spray your cleaning solution onto a cloth rather than directly onto the chandelier. This controlled application keeps liquid away from wiring, junction boxes, and other electrical components. Wipe each crystal or glass element individually, working from top to bottom.
-
Avoid touching any wiring or connection points during cleaning. If you must adjust the fixture position, grip only the decorative frame or arms. Never pull on wires to move the chandelier.
-
Allow the entire fixture to air dry completely before replacing bulbs or restoring power. Depending on humidity and ventilation, drying may take several hours. Rushing this step invites electrical problems.
Pro Tip: Place a bowl of uncooked rice or silica gel packets in the chandelier canopy area to absorb residual moisture. These desiccants speed drying in hard-to-reach spots where water might linger.
Work methodically through the fixture rather than jumping between sections. This organized approach ensures you clean every element without missing spots or backtracking. It also helps you track your progress and maintain focus on safety throughout the task.
If you encounter unexpected resistance when wiping crystals or components, stop and investigate. Stuck elements might indicate corrosion, damaged mounting hardware, or other problems. Forcing movement can break delicate parts or disturb electrical connections. Assess the situation carefully before proceeding.
Pay special attention to the canopy where the chandelier mounts to the ceiling. This area houses critical electrical connections and often accumulates the most dust. Clean it gently with a barely damp cloth, keeping moisture to an absolute minimum. Never saturate this area or allow drips to enter the junction box.
Monitor your physical state during cleaning. Fatigue leads to mistakes like losing balance or forgetting safety steps. Take breaks every 20 minutes when working overhead. Stretch, hydrate, and refocus before returning to the ladder. Your safety depends on maintaining alertness throughout the project.
Before restoring power, conduct a final inspection. Check that all socket covers are removed, bulbs are properly seated, and no tools or cleaning supplies remain on or near the fixture. Verify the chandelier is stable and all decorative elements are secure. These safe cleaning procedures prevent problems when you flip the breaker back on.
Return to the breaker panel and restore power. Stand clear of the fixture when you first turn it on. Listen for unusual sounds like buzzing or crackling that indicate electrical problems. Watch for flickering, dimming, or other abnormal behavior. If anything seems wrong, shut off power immediately and consult an electrician.
Maintaining and inspecting chandeliers for ongoing safety
Regular maintenance extends your chandelier’s life while keeping electrical hazards in check. Routine inspection and maintenance reduce potential electrical hazards related to chandeliers, catching problems before they become dangerous. A consistent schedule takes the guesswork out of when to check your fixture.
Quarterly inspections should become routine. Every three months, examine wiring for frayed insulation, exposed conductors, or discoloration from heat. Check socket interiors for corrosion or carbon buildup. Inspect mounting hardware for looseness or metal fatigue. These quick checks take minutes but prevent major problems.
- Look for wire insulation that’s cracked, brittle, or pulling away from connections
- Test each socket by gently wiggling the bulb base to detect loose contacts
- Examine the canopy mounting screws and ceiling attachment points for stability
- Check for rust or corrosion on metal components that could indicate moisture exposure
- Note any unusual odors, especially burning plastic or hot metal smells
Cleaning frequency depends on your environment. Homes in dusty areas or with cooking nearby need monthly chandelier cleaning. Most households can maintain beauty and safety with quarterly cleaning sessions. Consistent cleaning prevents the heavy buildup that makes each session more difficult and time consuming.
Bulb replacement offers an inspection opportunity. When changing burned out bulbs, examine the socket closely. Carbon deposits or melted plastic indicate overheating problems. Using bulbs with wattage ratings higher than the fixture allows causes this damage. Always match replacement bulbs to manufacturer specifications.
| Inspection item | Frequency | Warning signs |
|---|---|---|
| Wire insulation | Quarterly | Cracks, brittleness, exposed copper |
| Socket condition | Each bulb change | Corrosion, carbon buildup, melting |
| Mounting hardware | Quarterly | Looseness, rust, metal fatigue |
| Overall stability | Monthly | Wobbling, sagging, unusual sounds |
| Cleaning needs | Monthly assessment | Visible dust, reduced light output |
Flickering lights signal electrical issues requiring immediate attention. Loose connections, failing bulbs, or circuit problems all cause flickering. If replacing bulbs doesn’t solve the problem, the issue lies in the fixture wiring or your home’s electrical system. Don’t ignore this warning sign.
Know your limits regarding electrical repairs. Replacing bulbs and basic cleaning are safe DIY tasks. Rewiring fixtures, replacing sockets, or addressing junction box problems require licensed electrician skills. Attempting complex electrical work without proper training risks serious injury and violates building codes in most areas.
Document your maintenance activities in a simple log. Note inspection dates, cleaning sessions, bulb replacements, and any problems discovered. This record helps you spot patterns like bulbs burning out faster than expected or recurring loose connections. It also provides valuable information for electricians if professional service becomes necessary.
Consider upgrading to LED bulbs if your chandelier allows. LEDs produce far less heat than incandescent or halogen bulbs, reducing stress on wiring and sockets. Lower operating temperatures extend fixture life and improve safety. Verify your chandelier is LED compatible before switching, as some older fixtures or dimmers may not work properly with LED technology.
Seasonal considerations affect chandelier maintenance. Winter heating and summer humidity create different challenges. Dry winter air reduces shock risk but can make dust cling to crystals through static electricity. Summer humidity increases conductivity and promotes corrosion. Adjust your maintenance schedule to address seasonal factors in your climate.
Incorporate chandelier care into your broader home maintenance routine. Include it in spring and fall deep cleaning sessions. Coordinate with HVAC filter changes or other regular tasks so you don’t forget. Making chandelier maintenance habitual ensures it happens consistently. These home cleaning safety tips integrate electrical awareness into your overall household safety culture.
Keep your chandelier sparkling safely with us
Maintaining chandelier beauty while prioritizing electrical safety requires the right products and knowledge. Professional cleaning solutions designed specifically for chandeliers deliver superior results without compromising safety. Brilliante Crystal Chandelier Cleaner’s drip-dry formula eliminates the need for rinsing, keeping excess moisture away from electrical components. Just spray and let it drip, the solution evaporates cleanly without residue or risk.

Our environmentally friendly, non-abrasive formula won’t tarnish metal components or damage delicate crystals. Hundreds of satisfied customers rate us number one for ease of use and spectacular results. Explore our complete line of Brilliante Crystal Cleaner products for solutions that make chandelier maintenance safe and simple. Discover more eco-friendly cleaning tips and holiday chandelier cleaning tips to keep every fixture in your home shining brilliantly.
Frequently asked questions
How do I safely disconnect power before cleaning my chandelier?
Locate your home’s electrical panel and identify the circuit breaker controlling the chandelier. Switch this breaker to the off position and verify the lights don’t turn on. If available, use a non-contact voltage tester at the fixture to confirm power is completely disconnected. Never rely solely on wall switches, as they may not interrupt power to all fixture components.
What cleaning solutions are safe for chandeliers without risking electrical hazards?
Use cleaning products specifically formulated for chandeliers that are non-conductive and safe around electrical components. Avoid spraying any liquid directly onto wiring, sockets, or junction boxes. Distilled water mixed with mild detergent works for basic cleaning, but specialized drip-dry chandelier cleaners provide better results with less moisture exposure. Always apply cleaners to a cloth first rather than spraying the fixture directly.
How often should I inspect my chandelier’s wiring for safety?
Inspect your chandelier’s wiring and electrical connections at least every three months. Look carefully for frayed wires, cracked insulation, corrosion around sockets, and loose mounting hardware. If you notice flickering lights, burning odors, or other unusual behavior between inspections, examine the fixture immediately. Schedule a professional electrician inspection annually or whenever you’re uncertain about the fixture’s condition.